
Do you have a regular phone recording and want to see how it would look in a different location, with a different item or outfit? Higgsfield Genjutsu in Object Swap mode allows you to create a new version of the image based on the video and reference images. This guide shows the entire process without assuming editing experience: from conceptualizing the movement, setting up attachments and prompts, to reviewing the finished clip. Two original examples demonstrate how to plan a scene with a car and a scene in a greenhouse.
The "before" and "after" images below are conceptual illustrations created for this guide. They are not frames from rendered video. The tool's features were checked on October 4, 2026; button names, limits, and export quality may change.
The Simplest Rule: Record the Action You Want to Preserve
Genjutsu uses the source video as a motion plan. If someone on the recording grabs a doorknob, they will also try to grab a doorknob in the new version. If they lean over a plant, their hand will still move in that direction. Therefore, the first question is not "what should I enter in the prompt?" but: what movement do I want to see in the finished scene?
This is particularly important when swapping an object. The new object should be able to be held in a similar way. A thin garden meter can be swapped for a small scanner; it is very difficult to convincingly swap it for a large suitcase without changing the arm positioning. The model can improve the appearance, but it is not worth expecting it to perform physically impossible choreography.
Work Plan in Five Stages
| Stage | What You Do | What You Check |
|---|---|---|
| 1. Film | You record a short, clear shot. | Face, hands, contact with the prop, frame stability. |
| 2. References | You gather images of the person, object, outfit, or location. | Each image has a specific role and fits the movement. |
| 3. Genjutsu | You select Object Swap, add the video and images. | The file numbering corresponds to the prompt. |
| 4. Prompt | You describe the changes and constant elements. | No conflicting commands or unfeasible relationships. |
| 5. Review | You watch the whole thing and download the result. | Movement, identity, background, light, sound, and ending. |
1. How to Record Good Material with a Phone
You don't need a professional camera. You need material from which movement can be clearly read. Clean the lens, choose a location with even lighting, and do a short test. Watch the test on a larger screen: can you see the face and fingers? Is the person not blocking the object for half the shot? Does strong light behind them not turn them into a silhouette without details?
- Plan the Beginning, Middle, and End
In the car scene: approaching the door, hand on the doorknob, opening it. In the plant scene: lifting the meter, touching the soil, looking at the reading. Each action has a clear beginning and end. Avoid sudden jumps out of frame.
- Leave Space for the Future Object
If a regular car is to become a wider roadster, do not frame the car right at both edges. If the entire environment is to change, show enough background for the new location to be clear.
- Maintain Consistent Lighting
The model must reconcile the person's shadow with the new scene. Soft afternoon light is easier than a mix of harsh sunlight, neon lights, and flash. Note the direction of existing light in the prompt.
- Record Several Variants of the Gesture
Two or three short shots give a better chance for a simple movement. Choose the one where the fingers do not blend into the background, the face is visible, and the important object does not rotate abruptly.
The official tool page shows the length ranges of clips depending on the available version. Before recording, check the current limit in your panel and trim the source to it. Similarly with resolution: choose the quality offered by your plan, rather than assuming that the 1080p option is available for everyone.
2. Gather Reference Images
A reference image tells the model what should appear in the new version. It is best if each file has one function: person, object, outfit, location. A shot of the entire vehicle from the side and three-quarters will be more useful than an artistic close-up of the headlight if the car in the video is almost fully visible. For outfits, show the style and color without covering the sleeves. For locations, choose a wide shot that explains the spatial layout.
Name the files before uploading, for example person.jpg, car.jpg, villa.jpg. In the prompt, you can use labels like @Video 1, @Image 1, etc., if your interface describes them that way. The order has no magic; it is about ensuring that the number in the text leads to the correct image. After uploading, look at the thumbnails and compare them with the reference map.
Do not include other people's faces, voices, brands, or protected materials without the appropriate rights. When working on client commissions, also establish whether the finished film can suggest real events. Original, neutral references save many problems during publication.
3. Where to Click in Genjutsu
Go directly to higgsfield.ai, log in, open Genjutsu, and select Object Swap. Upload the video to the editing material field. Then add images to the character, product, clothing, or environment reference field. Enable the prompt field if it is hidden behind a switch, and paste the task description. Before clicking “Generate,” check the model, cost, length, aspect ratio, and offered quality. You will find the finished material in the generation history or in the project library, depending on the current version of the panel.
Object Swap is used to modify the specified elements of the existing clip. If you primarily want to transfer movement to a completely new world, also check Motion Transfer. In this guide, we use Object Swap because we want to preserve the action layout from the phone.
Example A: Regular Car in Front of a House → Roadster by a Seaside Villa
In the recording, an adult man approaches a blue car and touches the doorknob. In the resulting variant, the car changes into a custom-designed, dark turquoise roadster, and the driveway becomes a courtyard by a modernist villa. The word “roadster” describes the type and proportions of the car; it does not require copying a specific brand. The most important detail is the contact of the hand with the doorknob. If the doorknob of the new vehicle is too far away, the scene will cease to be credible even if the paint and background look great.
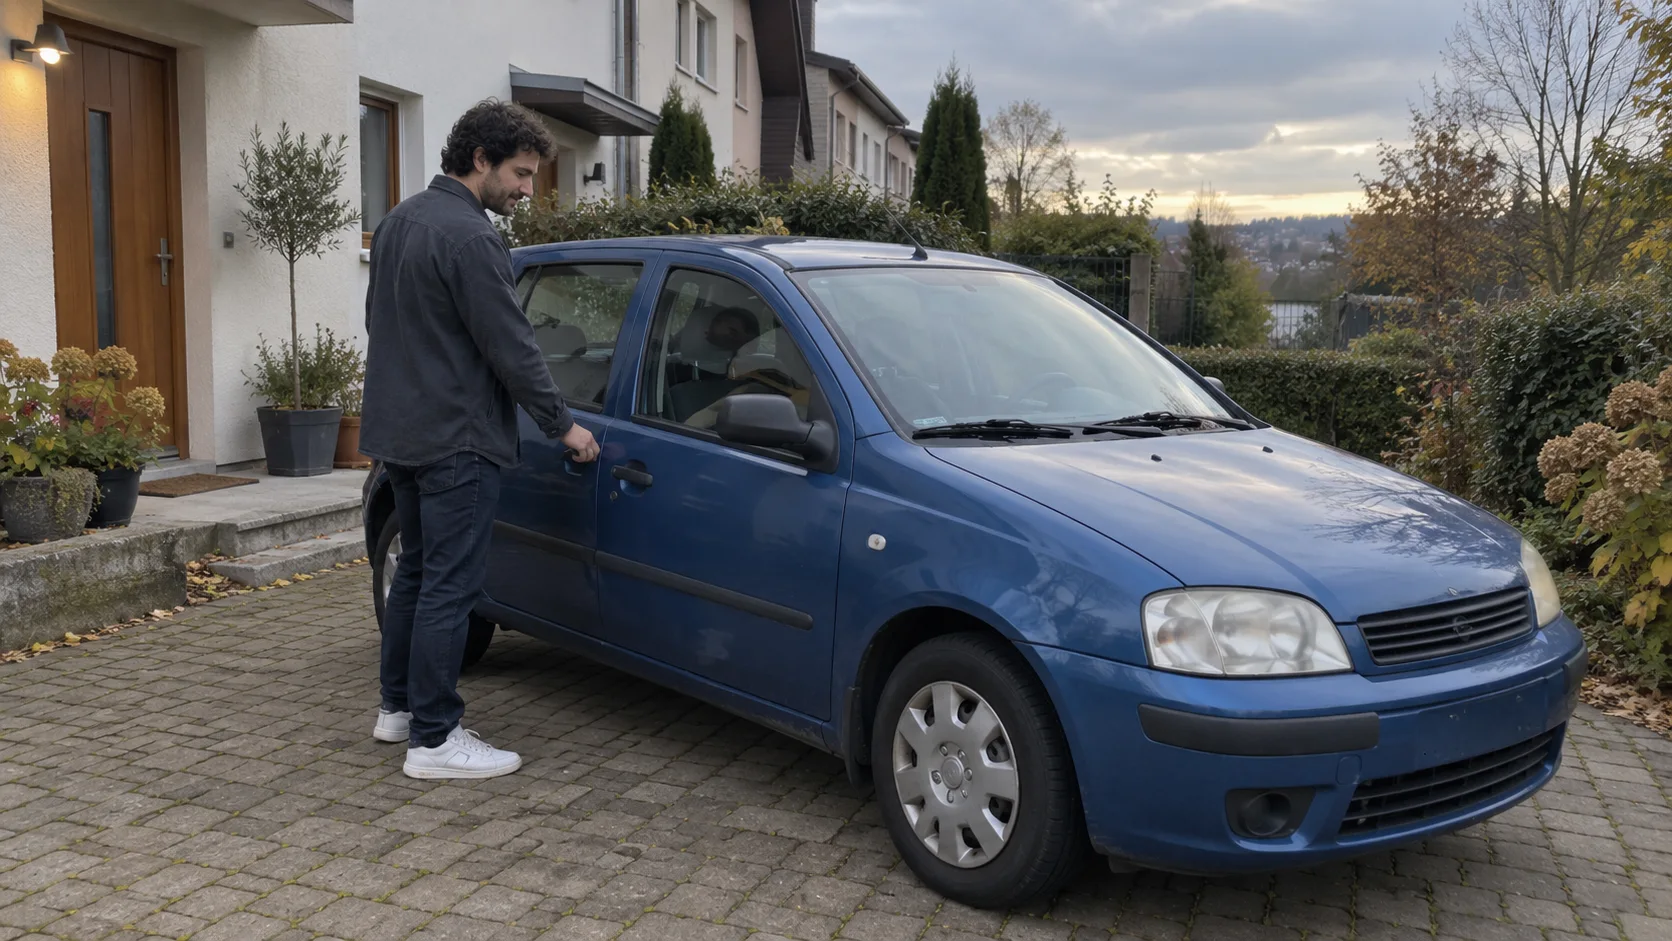
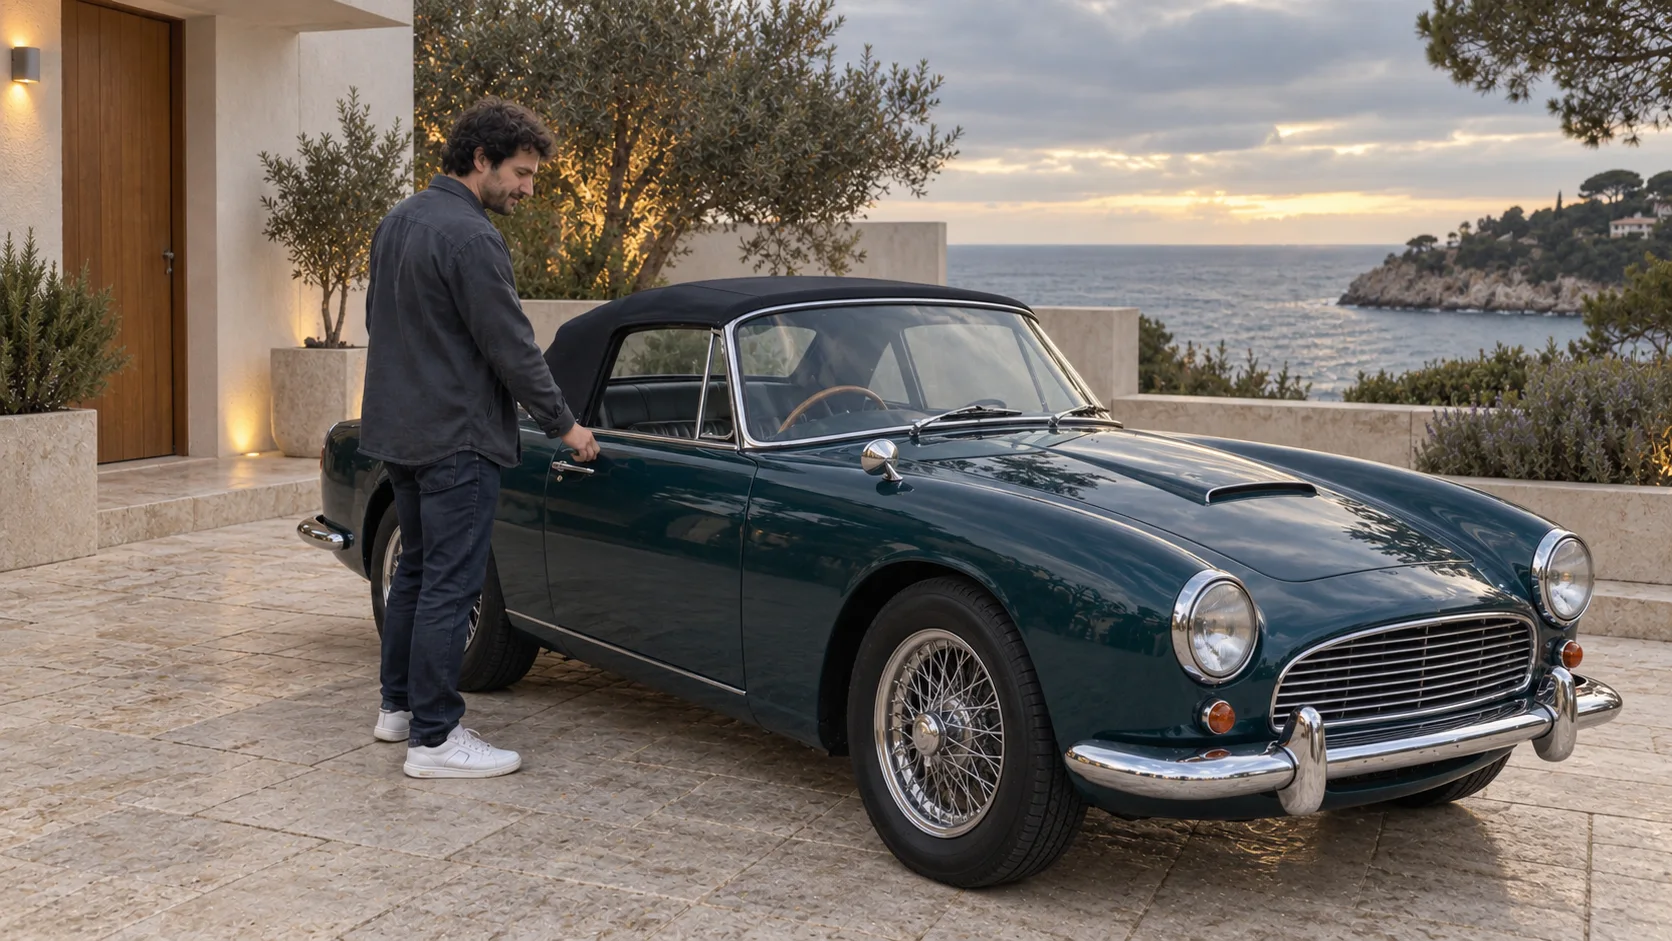
File Map
| File | What It Contributes |
|---|---|
@Video 1 | Human movement, car position, camera, time, and sound. |
@Image 1 | Clear face of the person, if identity needs reinforcement. |
@Image 2 | Roadster visible at a similar angle as the car in the recording. |
@Image 3 | Courtyard of the villa with space for the vehicle and a sea background. |
Edit the image of the film @Video 1. Preserve the duration, hand movement to the doorknob, steps, facial expressions, camera path, framing, and original sound. The person should retain the face from @Image 1 and the same size and position in the frame.
Replace the blue car with a dark turquoise, custom-designed roadster from @Image 2. Position the new vehicle in the same position and orientation. The driver's door handle should be exactly under the person's hand at the moment of touching and during opening. Maintain realistic reflections of the sky and surroundings on the paint; no logos or readable license plates.
Replace the neighborhood driveway with the courtyard from @Image 3: bright stone surface, low modernist house, and sea in the distance. Keep the direction and softness of the light from @Video 1; the shadows of the person and car should match. Do not add other people or vehicles. Everything not mentioned as a change remains consistent with @Video 1.
After generation, stop the film just before touching the doorknob, during, and just after opening the door. Check that the number of doors on the car remains constant, the hand does not pass through the metal, and the interior visible after opening matches the vehicle. These are more challenging points than a static showcase frame.
Example B: Urban Garden → Old Research Greenhouse
The second scene practices another principle: swap an object for one with a similar grip. The protagonist touches the ground with a garden meter, leaning against a brick pillar. In the resulting version, she stands in a historic greenhouse, holding a small botanical scanner, and the pillar becomes a stone column. The hand movement does not require rethinking from scratch. Swapping the column is important because the body leans against it; the new element must maintain the same position and contact surface.
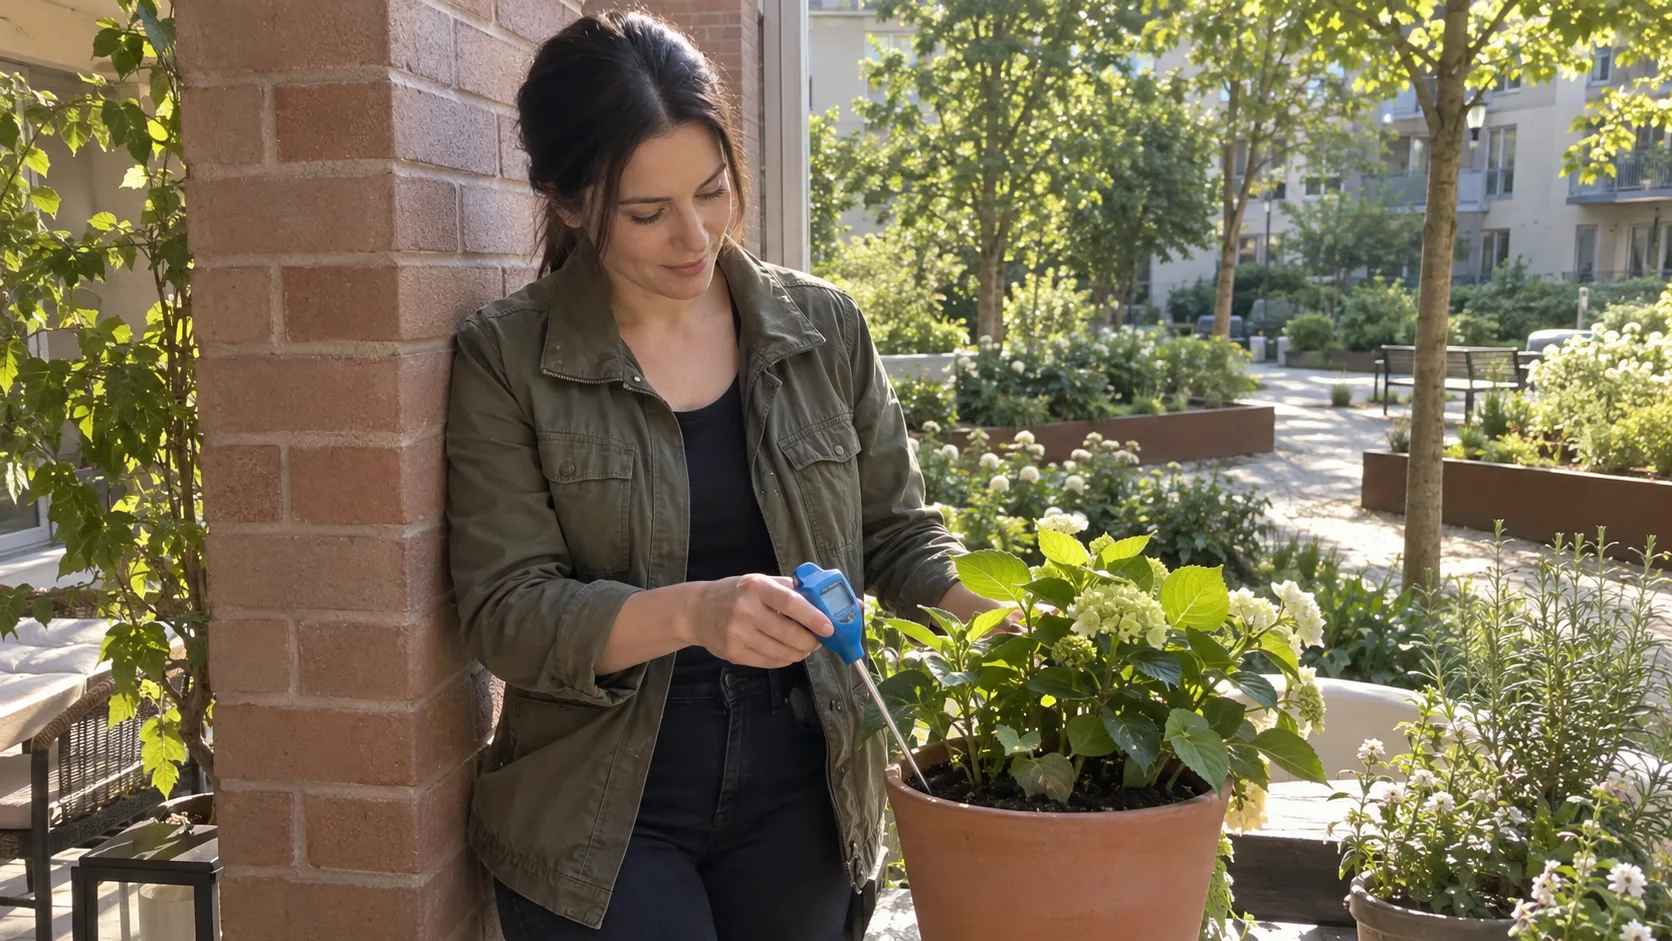
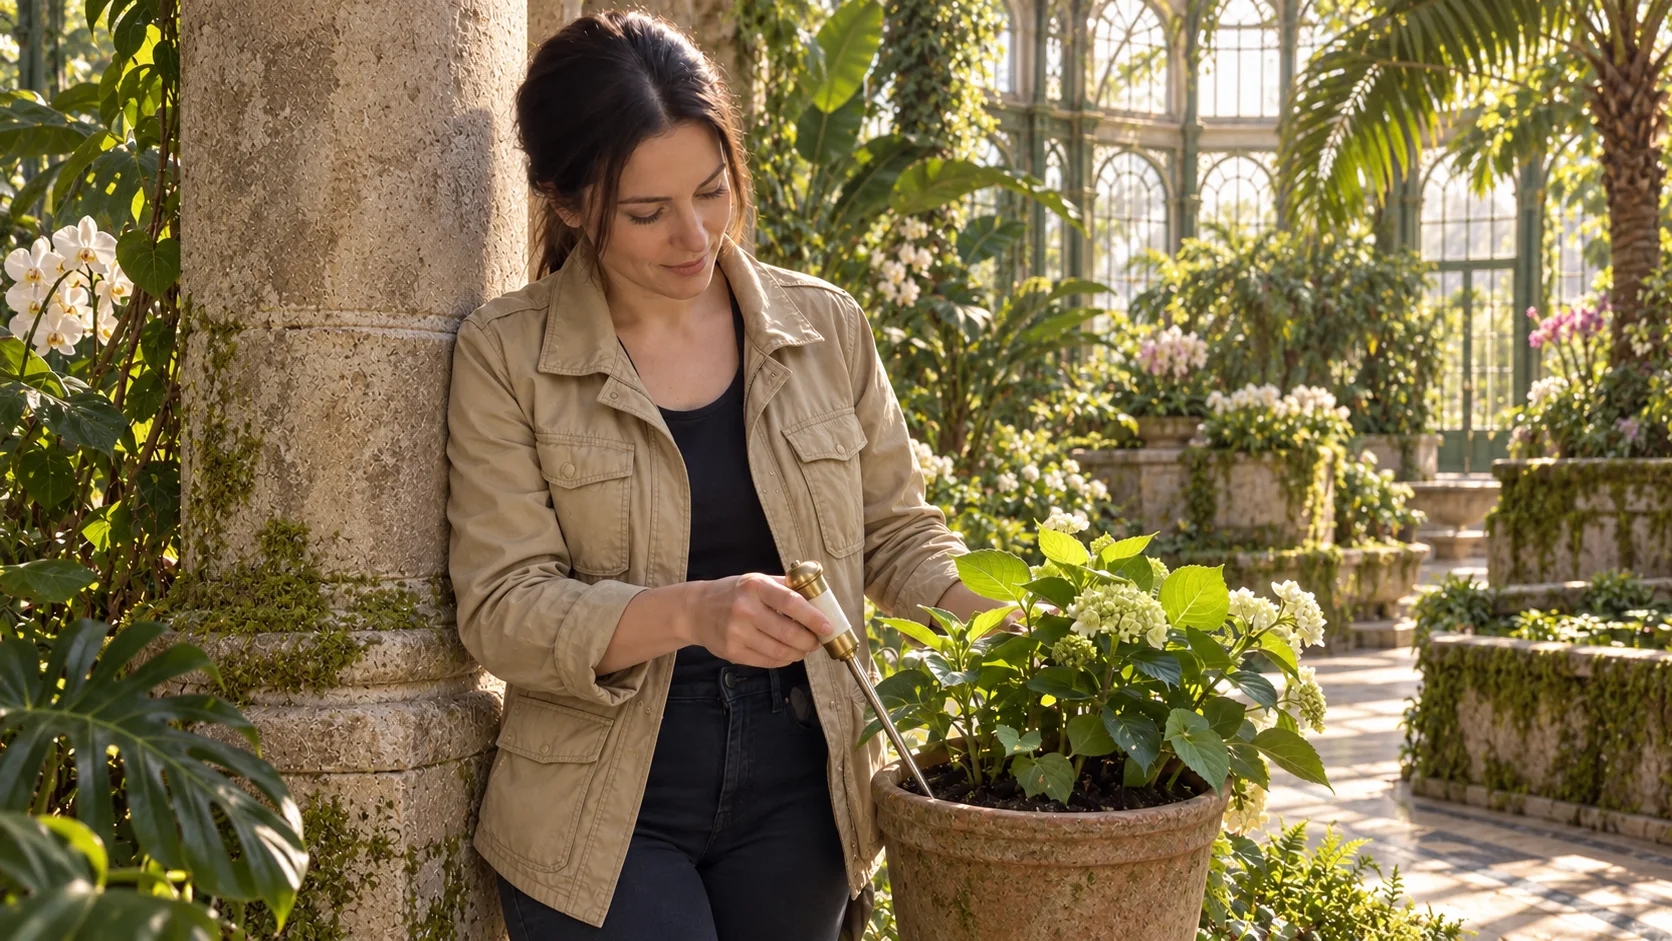
File Map
| File | What It Contributes |
|---|---|
@Video 1 | Gesture of bringing the meter closer to the plant, body, camera, and sound. |
@Image 1 | The identity of the protagonist, if a separate portrait is needed. |
@Image 2 | Sand-colored field jacket; without copying the model from the photo. |
@Image 3 | A small botanical scanner with proportions similar to the meter. |
@Image 4 | The interior of the old greenhouse with stone columns and plants. |
Create a new version of the image @Video 1. Preserve one continuous camera work, shot length, movement and position of the protagonist, her gaze at the plant, and body contact with the pillar. Keep the original sound.
The protagonist remains the same person from @Image 1. Replace her jacket with a sand-colored field jacket from @Image 2, without changing the body shape and without moving the person's face from the outfit photo.
Replace the blue meter in her RIGHT hand with a small botanical scanner from @Image 3. The scanner remains in the same grip and at the same angle, and its tip is directed toward the plant. The left hand remains as in the source film. Do not add a second device or text on the scanner screen.
Replace the urban garden with the interior of the greenhouse from @Image 4: iron arches, high glass, lush vegetation, and stone pots. The brick pillar that the protagonist leans against becomes a stone column in exactly the same place and of the same width. Maintain the direction of the afternoon light and realistic shadows. Do not add other people, logos, or readable text. Other elements remain consistent with @Video 1.
In this scene, control the tip of the scanner and the place where it touches the plant. If the model changes the length of the device, it may pass through the leaves or soil. Also check the boundary between the shoulder and the column: the new texture should not give the impression that the character suddenly detaches from it.
How to Write Prompts That Can Be Improved
Start with one sentence about the task: “edit the image @Video 1.” Then note the constant things: movement, time, camera, person, sound. Next, describe each change in a separate paragraph. Finally, add a short block against additional people, text, and unplanned changes. This structure makes diagnosis easier: when the car fails, you improve the paragraph about the car; when the background fails, you improve the paragraph about the background.
Do not simultaneously request “exactly the same light” and “completely different time of day,” unless you describe how the lighting should change. Do not ask to maintain the same size of the car if the new type has clearly different proportions, without indicating which points must overlap. The most valuable are geometric relationships: hand to doorknob, foot to floor, back to pillar, device to plant.
After Generation: A Simple Checklist
- Watch the entire film, not just the thumbnail from history. An error may appear in one frame during the hand's rotation.
- Compare movement with the original: beginning of the gesture, contact point, end of the gesture, steps, and any cuts.
- Check identity: face, hairstyle, height in the frame, hands, and clothing at the beginning, middle, and end.
- Check space: does the new car not change model, and does the greenhouse not “float” during the camera pan?
- Check light: direction of shadows on the person, object, and ground.
- Listen to the sound: the original speech should still match the lip movement. The tool may change the image itself, so do not assume a new voice.
- Check the end: the result may have a different number of frames than the source file. Sync audio in the editor if necessary.
If the Effect Doesn't Work the First Time
| Symptom | Likely Cause | What to Do |
|---|---|---|
| Hand misses the doorknob | The new car has a different door layout. | Select a reference with a similar angle and mark the position of the doorknob relative to the hand. |
| Object disappears or duplicates | Too fast movement, occlusion, or unclear number of objects. | Indicate the hand, grip, and “exactly one”; choose a simpler segment. |
| Face changes midway | Not clear enough reference or conflicting images. | Add a well-lit portrait and name the role of each photo. |
| Background has a different perspective | The location photo shows a completely different camera angle. | Use references from a similar height and direction of view. |
| Scene looks like a paste-in | Shadows, sharpness, or graininess do not match. | Describe the direction of light and the behavior of the phone image; limit the number of changes. |
Each subsequent run may cost time or credits. With a difficult shot, first test one swap on a shorter segment. Once the hand and new object work, add wardrobe or background. Keep the source version and selected results separately. Combining segments in a simple cut editor may give better control than redoing the entire long film.
If the Movement Is to Transfer Us to a New Scene
Swapping the entire location works best when the new world has a logical response to the gesture from the source. If someone opens a door, there should be a hallway or terrace behind it in the correct direction. If they turn their head to the left, show an element on that side that they might be looking at. Choose a frame from the film just before the important movement and prepare a reference image from a similar camera height, direction of view, and space for the character. Matching perspective facilitates a credible transition.
With several different scenes, consider one generation per scene, and combine the finished segments in the editor on the gesture, camera movement, or pause in dialogue. This gives greater control over the cut point than one very long prompt describing multiple locations. For testing, choose a short segment covering a few frames before and after the gesture. Only after checking the hand, eyes, scale of the character, and direction of movement should you generate the entire episode. Save the references used and the version of the prompt to be able to repeat the result.
Useful frame-by-frame control: does the foot still rest on the floor, does the hand hit the new surface, does the shadow move with the person, and does the background not change scale in the middle of the pan? If the transition breaks down, first improve the consistency of the reference image with the source frame or simplify the movement itself. A longer prompt usually will not fix poorly matched geometry.
What Next?
This exercise is the easiest entry into editing existing material. If you want to build an AI film from the first frame, read our Soul 2.0 → Seedance 2.5 → Genjutsu guide. If you need to swap several elements in exact time intervals, go to the detailed guide on character, prop, and background on the timeline. When planning a new space and subsequent frames, see one recording in multiple locations. The choice of focal length is explained in our framing guide.
Comments (0)
No comments yet. Be the first!