
You have your own short advertisement: a quick walk, a detail of shoes, a bag in the car, a glance in the mirror, and a finale in the elevator. You want a new fictional character to appear in each of these shots while keeping the editing the same. This is a different task than generating a new scene from scratch. We will show you how to prepare two clear references of the person, outline all the places where their body or reflection appears, perform the swap in Genjutsu, and check the result after the cuts.
The illustrations depict our original, fictional advertisement project without a brand. These are conceptual and reference images, not frames from a tested Genjutsu render. The final effect depends on the quality of your own source material, model, and iterations.
When Does Such a Guide Make Sense?
If the person in the film changes but the movement, editing, location, and props are to remain, start with the mode of swapping the selected element in the existing video. Higgsfield describes Genjutsu Object Swap as changing the selected character, outfit, or item while keeping the rest of the shot intact. Do not assume that every cut will turn out perfectly: a very small face, a reflection in glass, or a hand partially covered by a bag are more challenging than a standard portrait.
Work with your own or licensed footage and the image of a person you can use. In our example, there are no logos of real fashion houses, store names, or distinctive packaging of someone else's brand. This gives control over what the model should keep and what to change, and does not require the generator to recreate readable labels on bags.
Example: 12 Seconds of a Shopping Film in Warsaw
We plan six shots in one sequence. On the wet pavement, burgundy ankle boots are visible; a woman passes a storefront; she places a navy paper bag on the seat of a silver coupe; her eyes appear in the mirror; a wide shot shows the car and the boutique; finally, she enters the elevator with bags. The background transitions from a cool street to a warm interior. In the source film, these actions, cuts, and locations must already exist. Genjutsu is to replace only the main character.
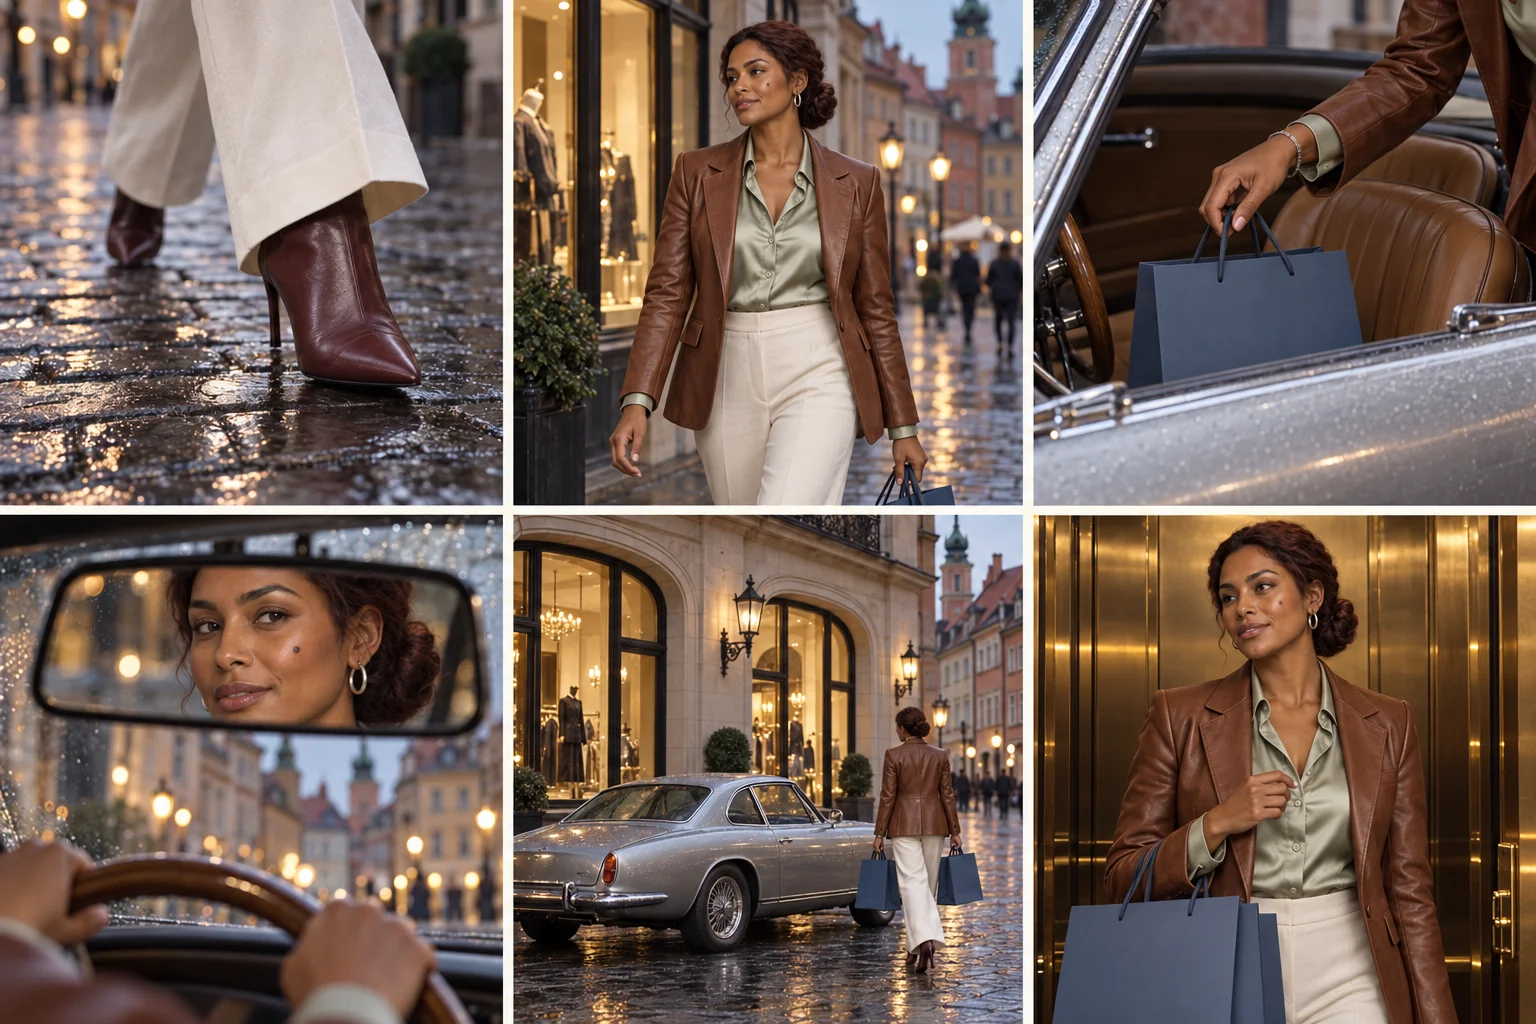
| Shot | Time in Example Film | Where to Check New Identity |
|---|---|---|
| 1 · shoes | 0–1.5 s | Ankle boots, pant legs, and walking style; the face does not need to be visible. |
| 2 · storefront | 1.5–3.5 s | Full face, hairstyle, jacket, scale of the character against the street. |
| 3 · bag in the car | 3.5–5 s | Hand, bracelet, sleeve, and bag handle; number of fingers. |
| 4 · mirror | 5–6.5 s | The same eyes, eyebrows, and hairstyle despite the reflection; correct direction of gaze. |
| 5 · wide shot | 6.5–9 s | Silhouette, outfit, number of bags, and position of the car. |
| 6 · elevator | 9–12 s | The same face and outfit in warmer light, hands on the bags. |
The times are an example for your own storyboard. In the finished material, read the actual cut points frame by frame. Do not enter seconds copied from another film into the prompt if your shots have a different length.
Two References of One Person: Silhouette and Face
A large portrait helps with the look into the camera and mirror, while a full silhouette establishes the outfit, proportions, and shoes. Both images should come from the same approved character. If you generate them separately without a common source image, you can easily end up with similar but different people. For a long campaign, you can expand the set with a profile and character card; for our 12-second test, we start with two images.
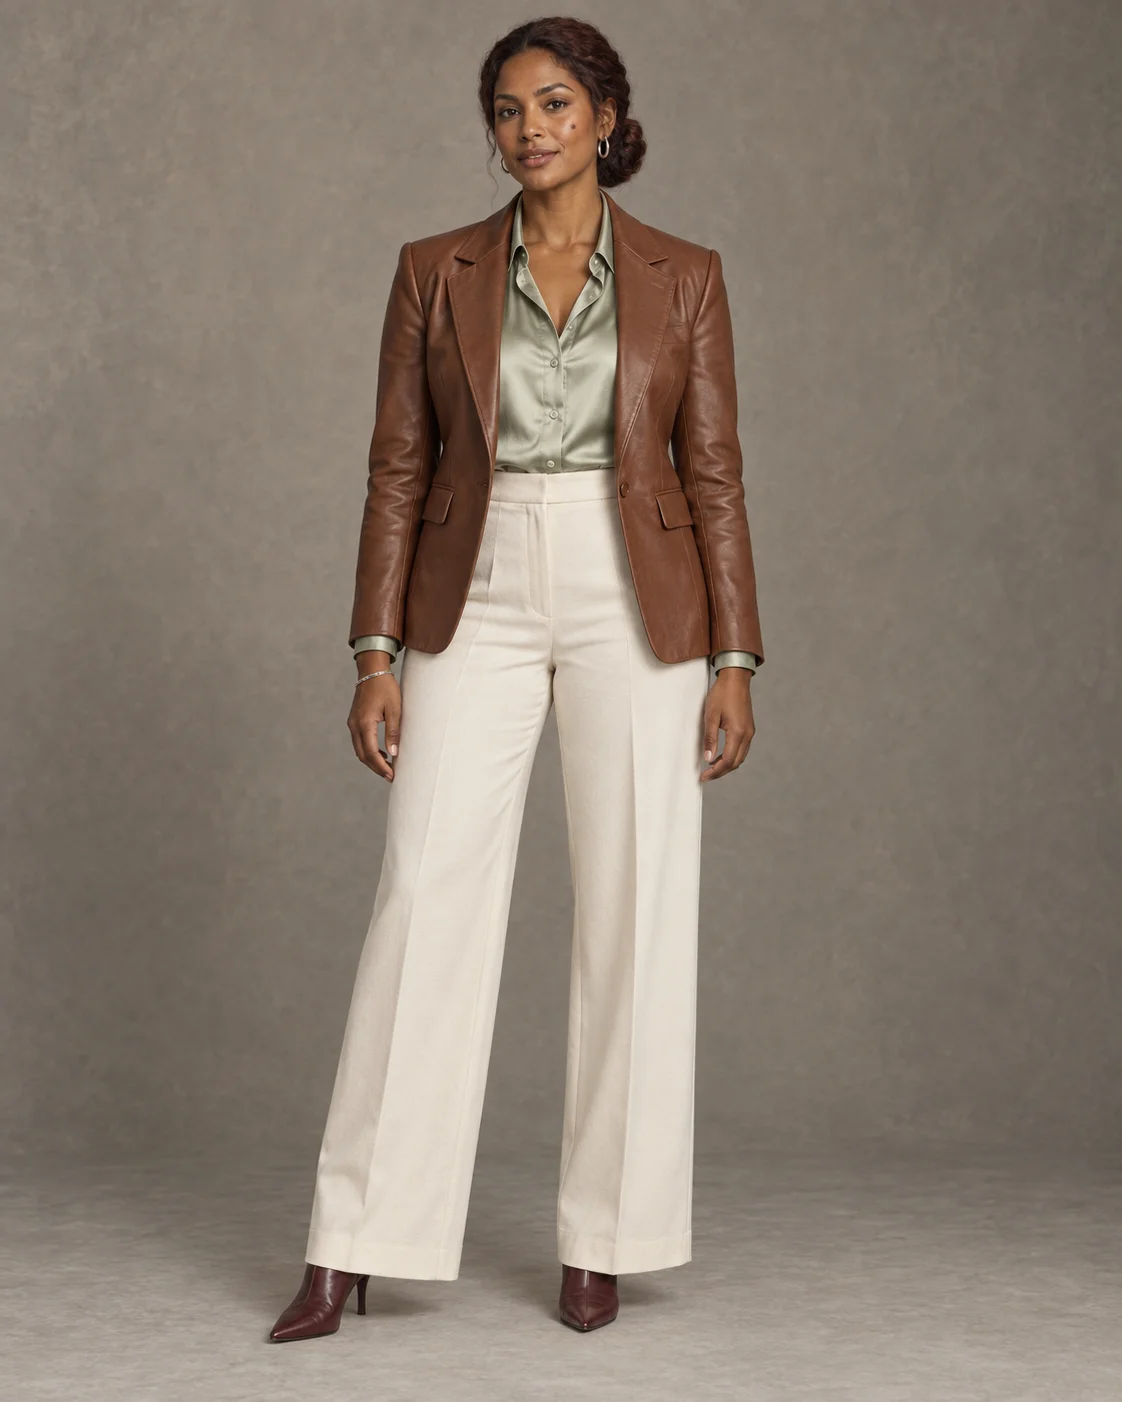
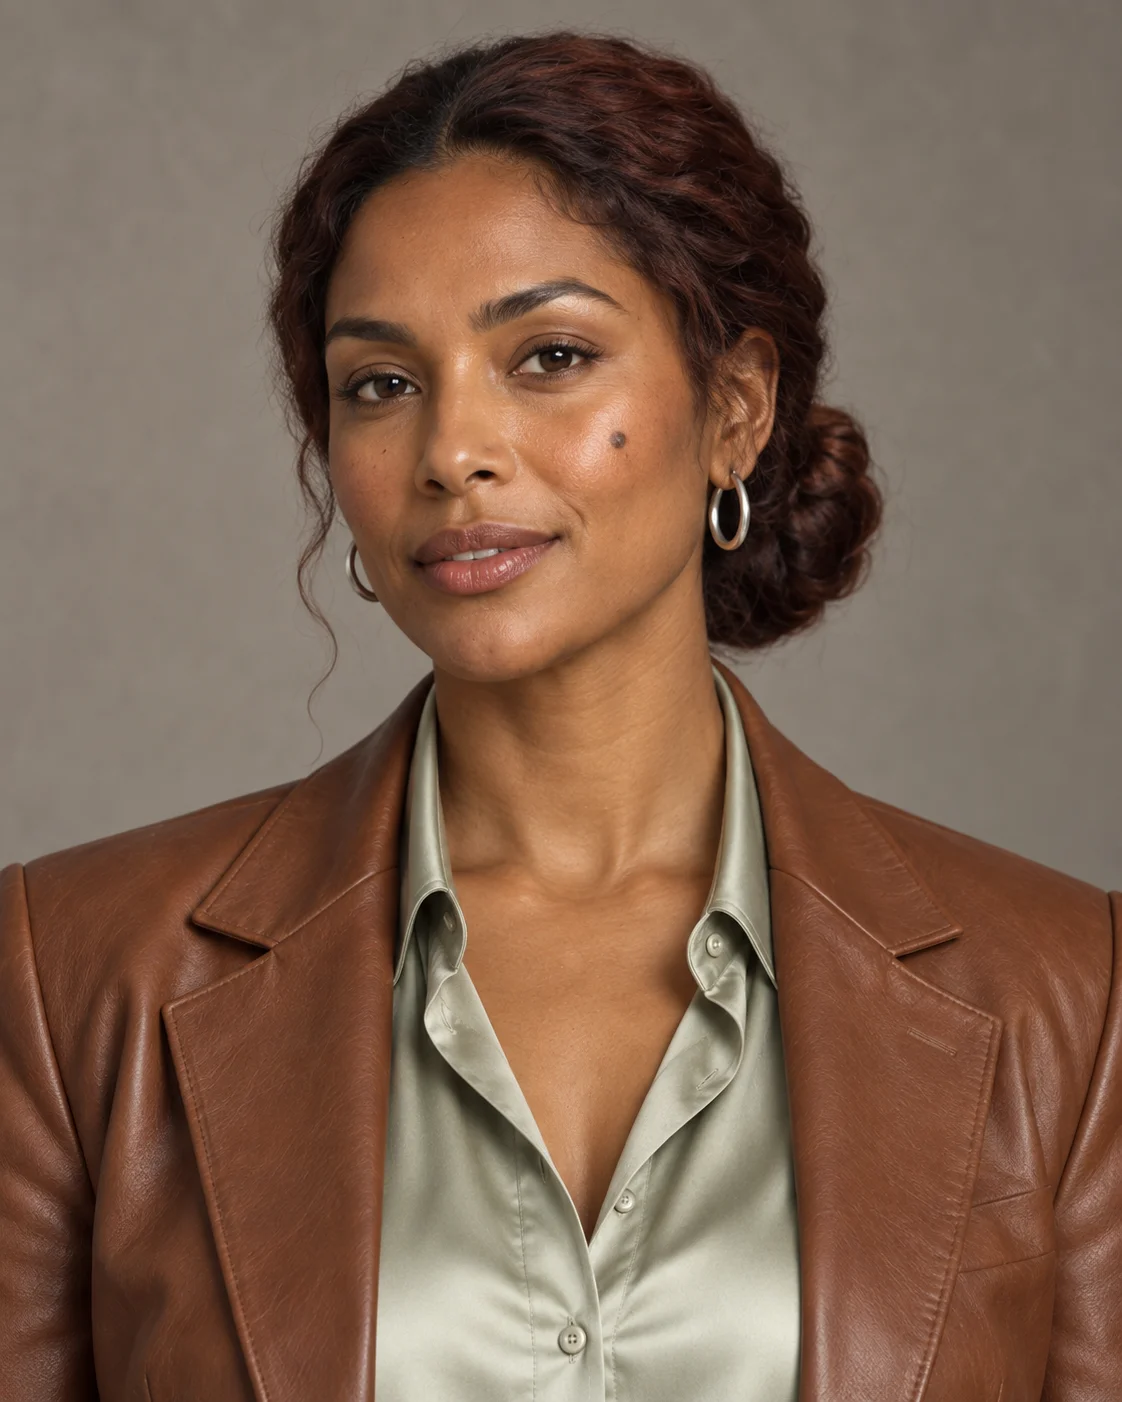
Our character has a warm dark complexion, chestnut hair styled low at the back, a small mole on her left cheek, a cinnamon-colored leather jacket, a sage shirt, wide light pants, and burgundy ankle boots. In conceptual images, a minor detail may differ. Therefore, before using them as references, enlarge both images and choose which is dominant for the face. In our example, this role is fulfilled by the portrait.
Realistic studio portrait of a full adult woman on a matte warm gray background, soft light from the left. Warm dark complexion, oval face, dark eyes, small mole on the left cheek, chestnut hair in a low braided bun, small silver earrings. Brown fitted leather jacket, light sage satin shirt, wide ivory-colored pants, burgundy pointed-toe ankle boots, and a thin silver bracelet on the right wrist. The character stands facing forward, hands relaxed at her sides. The entire head, both hands, and complete shoes are in the frame with extra space. Natural texture of skin and fabrics. One person, no bags, captions, logos, or additional accessories.
Include the approved full silhouette image as the only source for the character's appearance. Prepare a new head and shoulders portrait of the same person. Retain facial features, skin tone, eyes, small mole on the left cheek, chestnut low bun, silver earrings, sage collar of the shirt, and brown jacket. Use the same soft light from the left and matte warm gray background. Calm facial expression, visible natural skin texture, entire hair and chin in the frame. No beautification, age changes, new hairstyles, glasses, or captions.
A full silhouette can be created in Higgsfield Soul or another image generator. If you are using Soul 2.0, check its current interface: the official guide distinguishes working with just the prompt from the mode with an attached reference image. For the second portrait, use an image editing tool that allows you to describe the change while retaining identity, or prepare a compatible cut of good quality.
Prepare the Source Film Before the Swap
- Select one main person. If a seller or passerby reacts in the finale, indicate that they should remain unchanged. In the target mask, do not accidentally include a second face.
- Maintain the outfit. It is easiest when the person in the footage has the same cut and colors of clothing as the new reference. If you are also changing the wardrobe, you are giving the model two tasks at once and must check seams, sleeves, and obstructions by bags.
- Make a copy of the audio. Keep the original track separately. After rendering, you will check if the music, footsteps, and cut moments still hit the same places.
- Record the cut points. Note the start of each shot in seconds. This is a map for viewing the result, and for a longer film, also for dividing the material.
- Check the entry limit. Higgsfield currently states a range of 4–30 seconds for the reference video in Genjutsu. Split a longer film into segments, preferably at hard cuts, with a small buffer on both sides. Then compile the approved results on the original timeline.
Do not promise yourself a perfect result from dozens of shots with one click. To start, choose 8–12 seconds covering both a large portrait and a challenging detail: the mirror or a hand on the bag. If these places turn out well, expand the trial.
Prompt for Genjutsu: Change Only the Main Character
Upload your own video as @Video 1, the full silhouette as @Image 1, and the portrait as @Image 2. The labels are examples: use the names and order visible after uploading files in your interface. Choose the mode of changing the selected element, not rebuilding the entire world. The prompt describes the goal of the swap and what should remain from the source material.
TASK: In @Video 1, replace only the main woman with one fictional character from @Image 1 and @Image 2. @Image 2 is the dominant reference for the face, eyes, mole, and hairstyle. @Image 1 establishes the silhouette, brown leather jacket, sage shirt, light wide pants, burgundy ankle boots, earrings, and bracelet. It is the same person in every shot. Do not copy the gray background of studio photos into the film.
KEEP FROM @Video 1: all six shots in the same order and time, exact cut moments, camera position and movement, walking pace, gesture of placing the bag down, glance in the mirror, position of the car, number of empty navy bags, layout of the street, store, and elevator. Keep other people unchanged. The original audio and music should remain on the same timeline if the tool transfers them correctly; do not create new words or effects.
SHOT MAP: 0–1.5 s boots and pant legs belong to the new character; 1.5–3.5 s her face and entire outfit are visible at the storefront; 3.5–5 s her right hand and bracelet place the bag on the seat; 5–6.5 s her face and eyes are in the mirror, not the source person's face; 6.5–9 s she has the same silhouette in a wide shot by the car; 9–12 s in the elevator she is still the same woman, despite the warmer light.
ADJUSTMENT: the new face, hair, and skin react to the light of each existing shot; the reflection in the glass and mirror matches the person in the frame. Retain the natural texture of skin, movement of hair and fabrics, correct number of fingers, contact of the hand with the bag handle, obstructions by the glass and bag. Do not change the car, bags, locations, cuts, length of the film, or other people. No new character, additional items, readable logos, captions, or smoothing of the face.
This is the full version for our six-element timeline. If the tool ignores a long prompt, shorten it to three things: one reference for the face, one for the outfit, everything except the main person remains from the video. Do not send the model conflicting portraits of the same character.
Storyboard: Plan Before the Film and Proof After the Film
The word “storyboard” here refers to two different materials. The concept board is created before editing and shows the intended shots – this is our illustration. The control board is created from actual frames of the finished render and allows you to check if the face, outfit, and props survived all cuts. Do not present the generated board as proof that the final film already exists or came out identically.
For the idea before production, you can use Higgsfield Popcorn, which according to the documentation creates sequences of up to eight frames. For a longer film, divide the plan into several small sets. A large board with 24 thumbnails gives little pixel data for the face and may be weak as a reference. Add shot numbers, seconds, and descriptions in the editor, instead of relying on correct text inside the generated image.
Use the approved portrait of the character as the source for the face and the full silhouette as the source for the outfit. Create six separate photorealistic frames of one fictional fashion advertisement in a layout of three columns and two rows, without captions and numbers. The same adult woman in each frame, where she is visible: brown leather jacket, sage shirt, light wide pants, burgundy ankle boots, chestnut low bun. A cool Warsaw street after rain, a warm storefront and elevator, a silver classic coupe, and empty navy paper bags without logos.
Frames in order: (1) low detail of the boots on wet pavement; (2) medium shot at the storefront; (3) a hand placing one bag on a leather seat; (4) the same eyes in the rearview mirror; (5) wide shot of the car and boutique, character with two bags; (6) close-up in the elevator. Different sizes of shots, consistent outfit, the same bags and car. No foreign brands, duplication of panels, additional hands, or invented captions.
Perform the control board after rendering: pause the film on a readable frame of each shot, save the images, arrange them in order, and add the actual times. For each, compare the face with the portrait, shoes with the full silhouette, and the bag and car with the original film. This is faster than watching twelve seconds in a loop and guessing where the mistake occurred.
How to View the Result Without Missing an Error?
| Location | Typical Problem | What to Fix First |
|---|---|---|
| Shot of shoes and legs | Different shoe style or disappearing pant leg. | Crop the full silhouette to a clear view of the lower part of the outfit and assign it that role. |
| Hand and bag handle | Handle goes through fingers, bracelet changes hands. | Fix only the short segment with the gesture; specify which hand is holding the handle. |
| Mirror and glass | Reflection shows the face of the source person or another character. | Add a clean portrait of the same person and indicate the reflection as part of the swap. |
| Wide shot | Silhouette changes, number of bags, or scale of the person. | Use a clear full silhouette; simplify this segment to one editing goal. |
| New light in the elevator | Face looks pasted on or changes skin tone. | Request matching to the existing lamp and shadows; do not change the entire room. |
| Cut to another person | Model also swaps a passerby or seller. | Indicate only the main person as the target, and clearly leave other people unchanged. |
Also listen to the beginning and end of each segment. If the tool changes the sound or shortens the result, overlay the preserved original track in the editor and align it to the same cut points. Do not assume that the phrase “keep audio” always yields an identical file.
What If the Film Is Longer Than 30 Seconds?
Do not upload a longer clip hoping the model will bypass the limit on its own. Split it into segments that fit within the current Genjutsu range, preferably at existing hard cuts. For example, a film lasting 38 seconds can be divided around the 18-second mark and processed in two parts. Do not cut in the middle of hand movement or a glance in the mirror if you have a calmer boundary of the shot nearby.
- Export both segments without changing the frame rate, aspect ratio, and order of shots.
- For both generations, include the same approved references for the face and outfit and the same short block of identity.
- Check the frames on both sides of the split. If the hairstyle or color of the jacket differs, fix one segment before editing.
- Compile the results on the timeline of the original and overlay the original audio. Trim any excess at the end of the renders.
If you need to change the location or cast the entire video with new people, that is a broader task than swapping one character. See our guide on two new characters and Motion Transfer. For individual items and time points, the Genjutsu Object Swap example on the timeline will be useful, and for a longer series of shots, a full character card will be beneficial.
Comments (0)
No comments yet. Be the first!